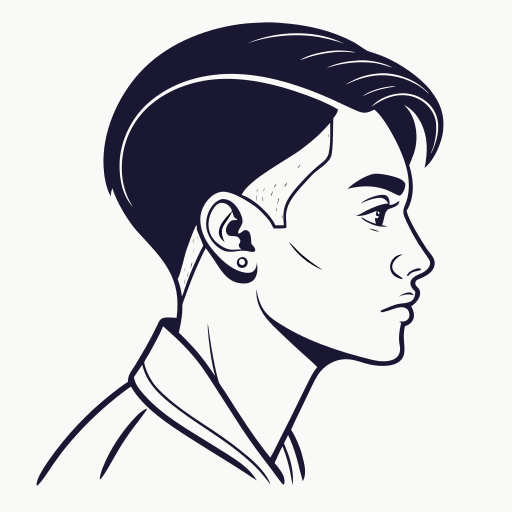
Skin Fade Textured Fringe: Low, Mid, and Drop Fade Options
Learn how to get a skin fade textured fringe with the right fade height, fringe length, texture, and barber wording for your hair type.
Key takeaways
- A skin fade textured fringe pairs bare-skin sides with a forward, choppy, or piecey top that needs enough length to fall naturally.
- Low and mid fades are the safest choices for most textured fringes because they keep side support and make the fringe look less disconnected.
- A drop skin fade can work especially well when the fringe is heavy, wavy, or curly because it keeps more shape around the back of the head.
- Ask your barber to protect the front length, add texture through the top, and avoid taking the fade so high that the fringe looks like a separate cap.
- Use matte paste, clay, texture spray, or light cream instead of heavy wet product if you want the fringe to stay natural and separated.
What is a skin fade textured fringe?
A skin fade textured fringe is a haircut where the sides and back fade down to visible skin while the top is left long enough to push forward into a textured fringe. The fringe can be messy, choppy, soft, blunt, wavy, or curly, but the key is that the front has movement rather than a flat straight-across finish.
The single core need behind this search is simple: you want a textured fringe with a skin fade and need the right fade height. That decision matters because the same fringe can look casual, balanced, or harsh depending on where the skin section starts. A low skin fade textured fringe keeps more side shape. A mid skin fade textured fringe adds clearer contrast. A high skin fade with fringe can look bold, but it is less forgiving if the top is thin, short, or hard to style.
Think of the haircut as two linked choices, not one preset style. The fade controls the sides and back. The fringe controls the face shape, forehead coverage, and daily styling. When those two parts are planned together, the haircut looks intentional from the front, side, and back. When they are not, the fade can climb too high and make the top look like it was left behind by accident.
Best fade height for a skin fade textured fringe
The best fade height depends on how heavy the fringe is, how much forehead coverage you want, and how strong you want the side contrast to look. Most people searching for a textured fringe skin fade are not looking for a severe high-and-tight result. They usually want clean sides, a modern top, and enough softness at the front to keep the haircut wearable.
| Fade option | How it changes the fringe | Best for |
|---|---|---|
| Low skin fade textured fringe | Keeps the bare-skin area low around the ear and neckline | First skin fades, longer faces, thick fringe, school or work-friendly versions |
| Mid skin fade textured fringe | Adds clear side contrast without removing all upper-side support | Most balanced textured fringe skin fade haircuts and daily wearable styles |
| High skin fade with textured fringe | Makes the top look sharper and more separated from the sides | Dense hair, bold contrast, short fringe, people comfortable with frequent cleanups |
| Drop skin fade textured fringe | Lets the fade dip behind the ear so the back keeps shape | Wavy, curly, heavy, or longer fringe styles that need support |
| Burst fade fringe | Keeps more focus around the ear and can look more dramatic from the side | Modern fringe shapes, edgier references, and people who like a curved side profile |
If you are unsure, ask for a low to mid skin fade with the fringe left textured. This gives the barber room to adjust the blend without pushing the cut too high. It also helps the front look connected to the rest of the haircut. A high skin fade textured fringe can work, but it usually needs dense hair and a confident top shape because the side contrast exposes mistakes quickly.
A drop fade is worth considering when the fringe has weight. Because the fade drops lower behind the ear, it can remove bulk around the sides while leaving more structure in the back. That is useful if your hair is wavy, curly, or thick enough that a straight wraparound fade would make the back look flat.
Fringe length, texture, and hair type
The fringe length decides whether the haircut looks controlled or accidental. A short textured fringe sits above the brows and is easier to style, but it gives less forehead coverage. A medium fringe can sit near the brow line and gives more movement. A longer fringe can look stronger in photos, but it needs more daily shaping and can collapse if the hair is too heavy.
Straight thick hair
Ask for point cutting, channel texture, or weight removal through the top so the fringe separates instead of forming one heavy block.
Fine or light hair
Keep the fade lower and avoid over-thinning the fringe, because too much texture can make the front look sparse.
Wavy hair
Use the wave direction as part of the style and keep enough length for the fringe to bend naturally.
Curly hair
Ask for curl-aware shaping and avoid cutting the fringe too short while wet because curls can shrink more after drying.
Receding temples
A softer low or mid fade with a loose fringe can be more forgiving than a high fade that exposes the corners.
The top should usually keep enough length to fall forward without being forced. For many textured fringe styles, roughly 2 to 4 inches at the front gives the barber room to create movement. Shorter versions can still work, especially with dense straight hair, but they start to look more like a crop than a true fringe. Longer versions need more product control and more careful layering.
Texture should be added with a purpose. If your hair is bulky, texture removes weight and helps the fringe break into pieces. If your hair is fine, too much texture can make it look thinner. The best instruction is not simply make it textured. Tell the barber whether you want a messy fringe, soft fringe, choppy fringe, curly fringe, or cleaner crop-fringe shape.
How to style a textured fringe skin fade
A textured fringe skin fade should not need a complicated routine, but it does need the right finish. Heavy wet pomade usually fights the look because it pulls the fringe into shiny clumps. Matte paste, clay, sea-salt spray, texture powder, or a light cream usually makes more sense because the goal is separation, movement, and a natural front.
- Step 1: Dry the fringe forwardAfter washing, towel-dry until damp and guide the front forward with your fingers so the hair remembers the direction.
- Step 2: Add light textureUse a small amount of texture spray, cream, or pre-styler before the hair is fully dry if it needs control.
- Step 3: Shape with fingersFinger-style the fringe rather than combing it flat, because separation is what makes the style look textured.
- Step 4: Finish with matte productWarm a small amount of paste or clay in your hands, then pinch the front and top lightly instead of coating every strand.
- Step 5: Check the side profileThe fringe should fall naturally while the fade stays clean around the ear, temple, and neckline.
| Fringe finish | Product direction | Watch out for |
|---|---|---|
| Messy textured | Matte paste, clay, or texture powder | Too much product can make the front stiff |
| Soft natural | Light cream or sea-salt spray | May need a quick reset during humid weather |
| Curly fringe | Curl cream or light leave-in | Avoid brushing out the curl pattern |
| Choppy crop fringe | Dry clay or paste | Over-thinning can create gaps |
| Long on top fringe | Pre-styler plus light finishing product | Heavy fringe can fall into the eyes |
If the fringe refuses to sit forward, the issue may be growth direction rather than product. A strong cowlick, double crown, or naturally backward hairline can make a fringe harder to maintain. In that case, ask for a softer forward crop or a loose brushed-forward shape instead of forcing a heavy fringe that fights your hair every morning.
How to ask for a skin fade textured fringe
The safest barber request names the fade height, skin finish, fringe length, top texture, and connection around the upper side. Do not rely on the phrase skin fade textured fringe alone. One barber may picture a low fade with a soft messy top, while another may picture a high fade with a short blunt fringe.
- Choose the fade heightSay low, mid, high, drop, or burst before the first guideline is cut.
- Confirm the bottom finishSay skin if you want the bottom taken to visible skin, or zero if you want it slightly softer.
- Protect the frontTell the barber how much fringe length to keep and whether it should sit above, at, or below the brow.
- Define the textureAsk for messy, choppy, soft, curly, or crop-like texture instead of using texture as a vague catch-all.
- Check the connectionAsk for enough weight near the top corners so the fringe does not look detached from the fade.
For a low skin fade textured fringe, change the script to low and ask for a softer, more wearable side profile. For a drop fade version, add that you want the fade to dip behind the ear and keep shape through the back. For a high version, be direct that you want bold contrast and are comfortable with a sharper grow-out.
Skin fade textured fringe mistakes, maintenance, and next step
The biggest mistake is choosing the haircut only from a front-view photo. A front photo shows the fringe, but it does not show how high the skin fade sits, whether the fade drops behind the ear, or whether the top connects cleanly into the sides. Always bring at least one side-view reference when asking for a skin fade with textured fringe.
- Do not take the fade high if you want a soft fringe and balanced face shape.
- Do not over-texturize fine hair, because the fringe can become see-through.
- Do not cut the front too short if you want it to fall naturally toward the brow.
- Do not use heavy wet product when the goal is matte separation.
- Do not ignore the back shape; a drop fade can suit heavy fringe better than a straight fade.
Maintenance is simple but regular. The skin section is sharpest for the first 3 to 7 days. By 1 to 2 weeks, the fade starts to soften around the ears and neckline. By 2 to 3 weeks, the haircut can still look good if the fringe is shaped well, but the bare-skin contrast will be less crisp. If you want the fade to stay photo-ready, book every 2 weeks. If you like softer grow-out, 3 weeks is usually workable.
The best conclusion for most people is to start with a low or mid skin fade textured fringe, keep enough length in the front to style, and adjust the fade higher only after seeing how your hair grows out. The primary keyword matters because this haircut is a combination: skin fade height, fringe length, top texture, and product finish all decide whether the result looks modern or awkward.
Before you book, compare low, mid, drop, and high versions from the side and front. SkinFade.app can help you preview the fade height, save a clearer barber reference, and avoid asking for a textured fringe skin fade that does not match your hair type.
Skin fade textured fringe FAQ
Is a skin fade textured fringe good for straight hair?
Yes, especially if the hair is dense enough to hold piecey texture. Ask the barber to remove weight through the top without thinning the front too much, then use matte paste or clay so the fringe separates naturally.
Should I get a low or mid skin fade with a textured fringe?
Choose low for the softest and safest version, especially if this is your first skin fade. Choose mid if you want clearer contrast while still keeping enough upper-side support for the fringe.
Can I get a high skin fade textured fringe?
You can, but it is the boldest version and works best with dense hair and a confident fringe shape. If your hair is fine, light, or thinning, a high fade may make the top look too separated.
How long should the fringe be for this haircut?
Many textured fringes need about 2 to 4 inches at the front, depending on hair type and how close to the brows you want it to sit. Shorter versions look more like crops, while longer versions need more styling.
What product should I use for a textured fringe skin fade?
Use matte paste, clay, texture powder, sea-salt spray, or light cream. Avoid heavy wet pomade unless you deliberately want shine, because textured fringe usually looks better with a dry natural finish.