How to Do a Skin Fade at Home
How to Do a Skin Fade at Home explained clearly. You can do a skin fade at home, but start low, use mirrors, work through small guard steps, and avoid raising...
Key takeaways
- You can do a skin fade at home, but start low, use mirrors, work through small guard steps, and avoid raising the skin line when the blend gets difficult.
- The clearest barber request includes fade height, skin finish, top length, neckline, and beard or sideburn plan.
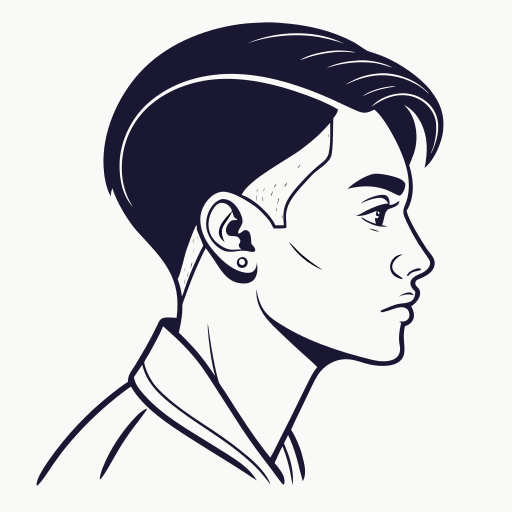
- A side-profile reference is more useful than a front-facing photo for judging skin fade height.
- If you are unsure, start lower and softer because the barber can always go shorter next time.
How to Do a Skin Fade at Home: start here
You can do a skin fade at home, but start low, use mirrors, work through small guard steps, and avoid raising the skin line when the blend gets difficult.
A tutorial article should be honest: a skin fade is a precision haircut. You can learn the order, but you need patience because the hardest part is not cutting the hair short; it is making the short sections disappear into each other.
The mirror matters as much as the clipper
At home, the hardest area is the back of the head. Start lower than you think, use two mirrors, and check symmetry before you raise the fade line.
| Zone | What happens there | Why it matters |
|---|---|---|
| First guideline | Set it lower than the final fade height | Starting too high removes your room to blend |
| Bottom finish | Clear below the line with trimmer or shaver | Taking the shaver above the line creates patches |
| Middle blend | Use lever, half guard, and 1 guard gradually | Skipping steps leaves a hard shadow |
| Top connection | Blend into the top without removing too much weight | Over-blending can flatten the haircut |
Cutting order for how to do a skin fade at home
- Set the skin guidelinePlace it lower than the final fade height so there is room to blend.
- Clear the bottomUse a trimmer, shaver, or razor below the line without climbing too high.
- Blend in small stepsUse lever adjustments and guards gradually instead of jumping from skin to long hair.
- Detail lastCheck both sides and the back before removing small dark spots.
The safest rule is to pause before you move the fade higher. If the line is not coming out, changing guards and pressure is safer than cutting more hair above the problem.
How to Do a Skin Fade at Home details that change the result
Start low and build upward
The lower you start, the more room you have to correct the blend.
Use small length changes
Lever positions and half guards matter because the hardest part is the transition from skin to short hair.
Cross-check both sides
A fade can look fine from one angle and uneven from another.
Stop before the fix gets bigger
If the line is not improving, pause and get help rather than raising the fade.
How how to do a skin fade at home should look when finished
A finished skin fade should look clean from the side and balanced from the back. The top should still have the shape you wanted, the skin section should not climb unexpectedly, and the neckline should look deliberate.
How to Do a Skin Fade at Home: what the searcher really needs
You can do a skin fade at home, but start low, use mirrors, work through small guard steps, and avoid raising the skin line when the blend gets difficult. That answer is the starting point, but it is not enough by itself. People searching for how to do a skin fade at home usually want to avoid a bad haircut decision, understand the exact barber wording, and picture how the result will look after the first week of growth.
The useful way to read this topic is to separate the label from the result. The label tells you what people call the haircut. The result depends on fade height, lowest cutting tool, hair density, top length, sideburn shape, neckline, beard connection, and how often you are willing to maintain the cut. A good article should help you choose among those details, not just repeat a one-line definition.
Related searches such as how to skin fade at home point to the same problem: users are comparing meanings, examples, timing, cost, suitability, or cutting steps before they commit. The best answer is therefore practical and visual. It should explain what changes on the head, what to say to a barber, and what tradeoff you are accepting.
A practical decision framework
Before choosing this version of a skin fade, think through the haircut in four layers. First is the bottom finish: clipper-close, trimmer-close, shaver-close, or razor-close. Second is the fade height: low, mid, high, drop, burst, or taper. Third is the top style: crop, curls, buzz cut, fringe, side part, slick back, pompadour, mohawk, or longer textured hair. Fourth is the maintenance plan: how long you want the cut to look fresh before it grows into a softer shape.
| Cutting decision | Safer choice | Why it matters |
|---|---|---|
| First guideline | Keep it low at first | A low mistake is easier to fix than a fade pushed too high |
| Tool order | Work from longer guards down to shorter detail work | Small steps reduce harsh lines |
| Mirror setup | Use two mirrors and strong light | The back of the head is where beginners lose symmetry |
| Top connection | Leave more length until the fade is blended | Cutting the top too early can remove your safety margin |
| Finish | Stop when the blend is even, not when the cut is extreme | Most beginner mistakes come from over-correcting |
This framework matters because two haircuts can share the same keyword and still look completely different. A low skin fade with a soft crop can look calm and professional. A high skin fade with a buzz cut can look athletic and severe. A burst skin fade with curls or a mohawk changes the outline around the ear. The search term gets you into the right category; the details decide whether the final haircut works.
Fit by hair type, face shape, and lifestyle
A skin fade is not judged only by how clean the blend is on day one. It also has to fit the person's hair texture and daily routine. Straight hair shows clipper lines clearly, so the blend has to be precise. Wavy hair usually needs enough top length to keep movement. Curly and coily hair often look best when the top keeps shape and the fade removes bulk around the ears without flattening the curl pattern.
Beginners
Start with a low guideline, open and close the lever slowly, and blend in small steps instead of jumping between guards.
Curly or coily hair
Keep the top shaped before tightening the fade. Cutting curls too short can make the outline collapse.
Fine hair
Avoid taking the fade too high because the scalp contrast can make the top look thinner.
Thick hair
Remove bulk gradually and check the head shape from the side before polishing the bottom.
Face shape changes the choice as well. A high fade can make the sides look narrower, which may suit a rounder face but can make a long face look even longer. A low fade keeps more side weight and usually feels safer for first-timers. A mid fade sits between the two and is often the most balanced choice when you want visible contrast without making the haircut feel extreme.
Lifestyle is the quiet detail people forget. If your school, workplace, or family setting is conservative, a low skin fade or skin taper is easier to defend than a high skin fade with shaved designs. If you need a haircut for photos, sports, events, or social content, a sharper mid or high fade can make sense. If you dislike frequent appointments, choose the softer version now instead of trying to stretch a very sharp fade for a month.
What to compare in reference photos
Reference photos are useful only when you compare the right parts. A front-facing photo often shows the top style but hides the fade height. A side photo shows where the fade starts and whether it is low, mid, high, burst, or drop. A back photo shows whether the neckline is natural, squared, rounded, or faded into the skin. For skin fade content, a four-panel or six-panel image with different people is usually more helpful than one perfect model.
| What to compare | Why it matters | What to ask yourself |
|---|---|---|
| Fade height | Controls how much scalp shows on the side | Does this look low, mid, high, drop, or burst? |
| Top length | Changes the whole personality of the cut | Is the top short, textured, curly, slicked, or long? |
| Hair texture | Affects whether the example can transfer to your hair | Is the model's hair straight, wavy, curly, coarse, or fine? |
| Beard or sideburns | Can make the haircut look connected or unfinished | Does the fade blend into facial hair? |
| Grow-out tolerance | Decides how soon the cut needs cleanup | Will this still look good after 10 to 14 days? |
When the example does not match your hair density or face shape, use it as direction rather than a demand. Tell the barber what you like about the photo: the low height, the clean neckline, the texture on top, the burst around the ear, or the beard blend. That gives the barber room to adapt the idea instead of copying a haircut that was built for someone else.
Barber wording and maintenance plan
The safest barber wording is specific but not controlling. Say the fade height, the shortest finish, the top direction, and any beard or neckline detail. Avoid saying only the keyword and expecting the barber to infer everything. Skin fade, zero fade, bald fade, taper fade, and regular fade can be used differently by different shops, so the finish needs to be described in plain language.
After the haircut, expect the shortest area to change first. Skin-close sections can show stubble within a few days, look softer after about 7 days, and feel much less sharp after 2 to 3 weeks. That does not mean the haircut is bad; it means the contrast is fading. If sharpness matters, schedule a cleanup every 1 to 2 weeks. If you prefer lower maintenance, ask for a low fade, skin taper, or softer regular fade.
At home, the best maintenance is simple: wash out heavy product, brush or style the top in its intended direction, keep the neckline clean only if you can do it safely, and avoid chasing the blend higher with clippers. Most bad home fixes happen because someone tries to remove a visible line and accidentally raises the entire fade.
Final checklist before you decide
- Do you have clippers, guards, trimmer, mirror setup, brush, comb, and good lighting?
- Can you see the back of your head clearly before cutting?
- Have you decided the maximum height the fade should reach?
- Are you working in small guard changes instead of trying to erase lines quickly?
- Will you stop before over-correcting a small mistake?
- Do you have a fallback plan if the blend becomes uneven?
If most of these answers are clear, you are ready to ask for the cut or try the tutorial. If several answers are still vague, start with the safer version: lower fade height, softer bottom finish, and more length left on top. You can always make a future haircut shorter, higher, or sharper, but you cannot make a too-high skin fade lower on the same day.